
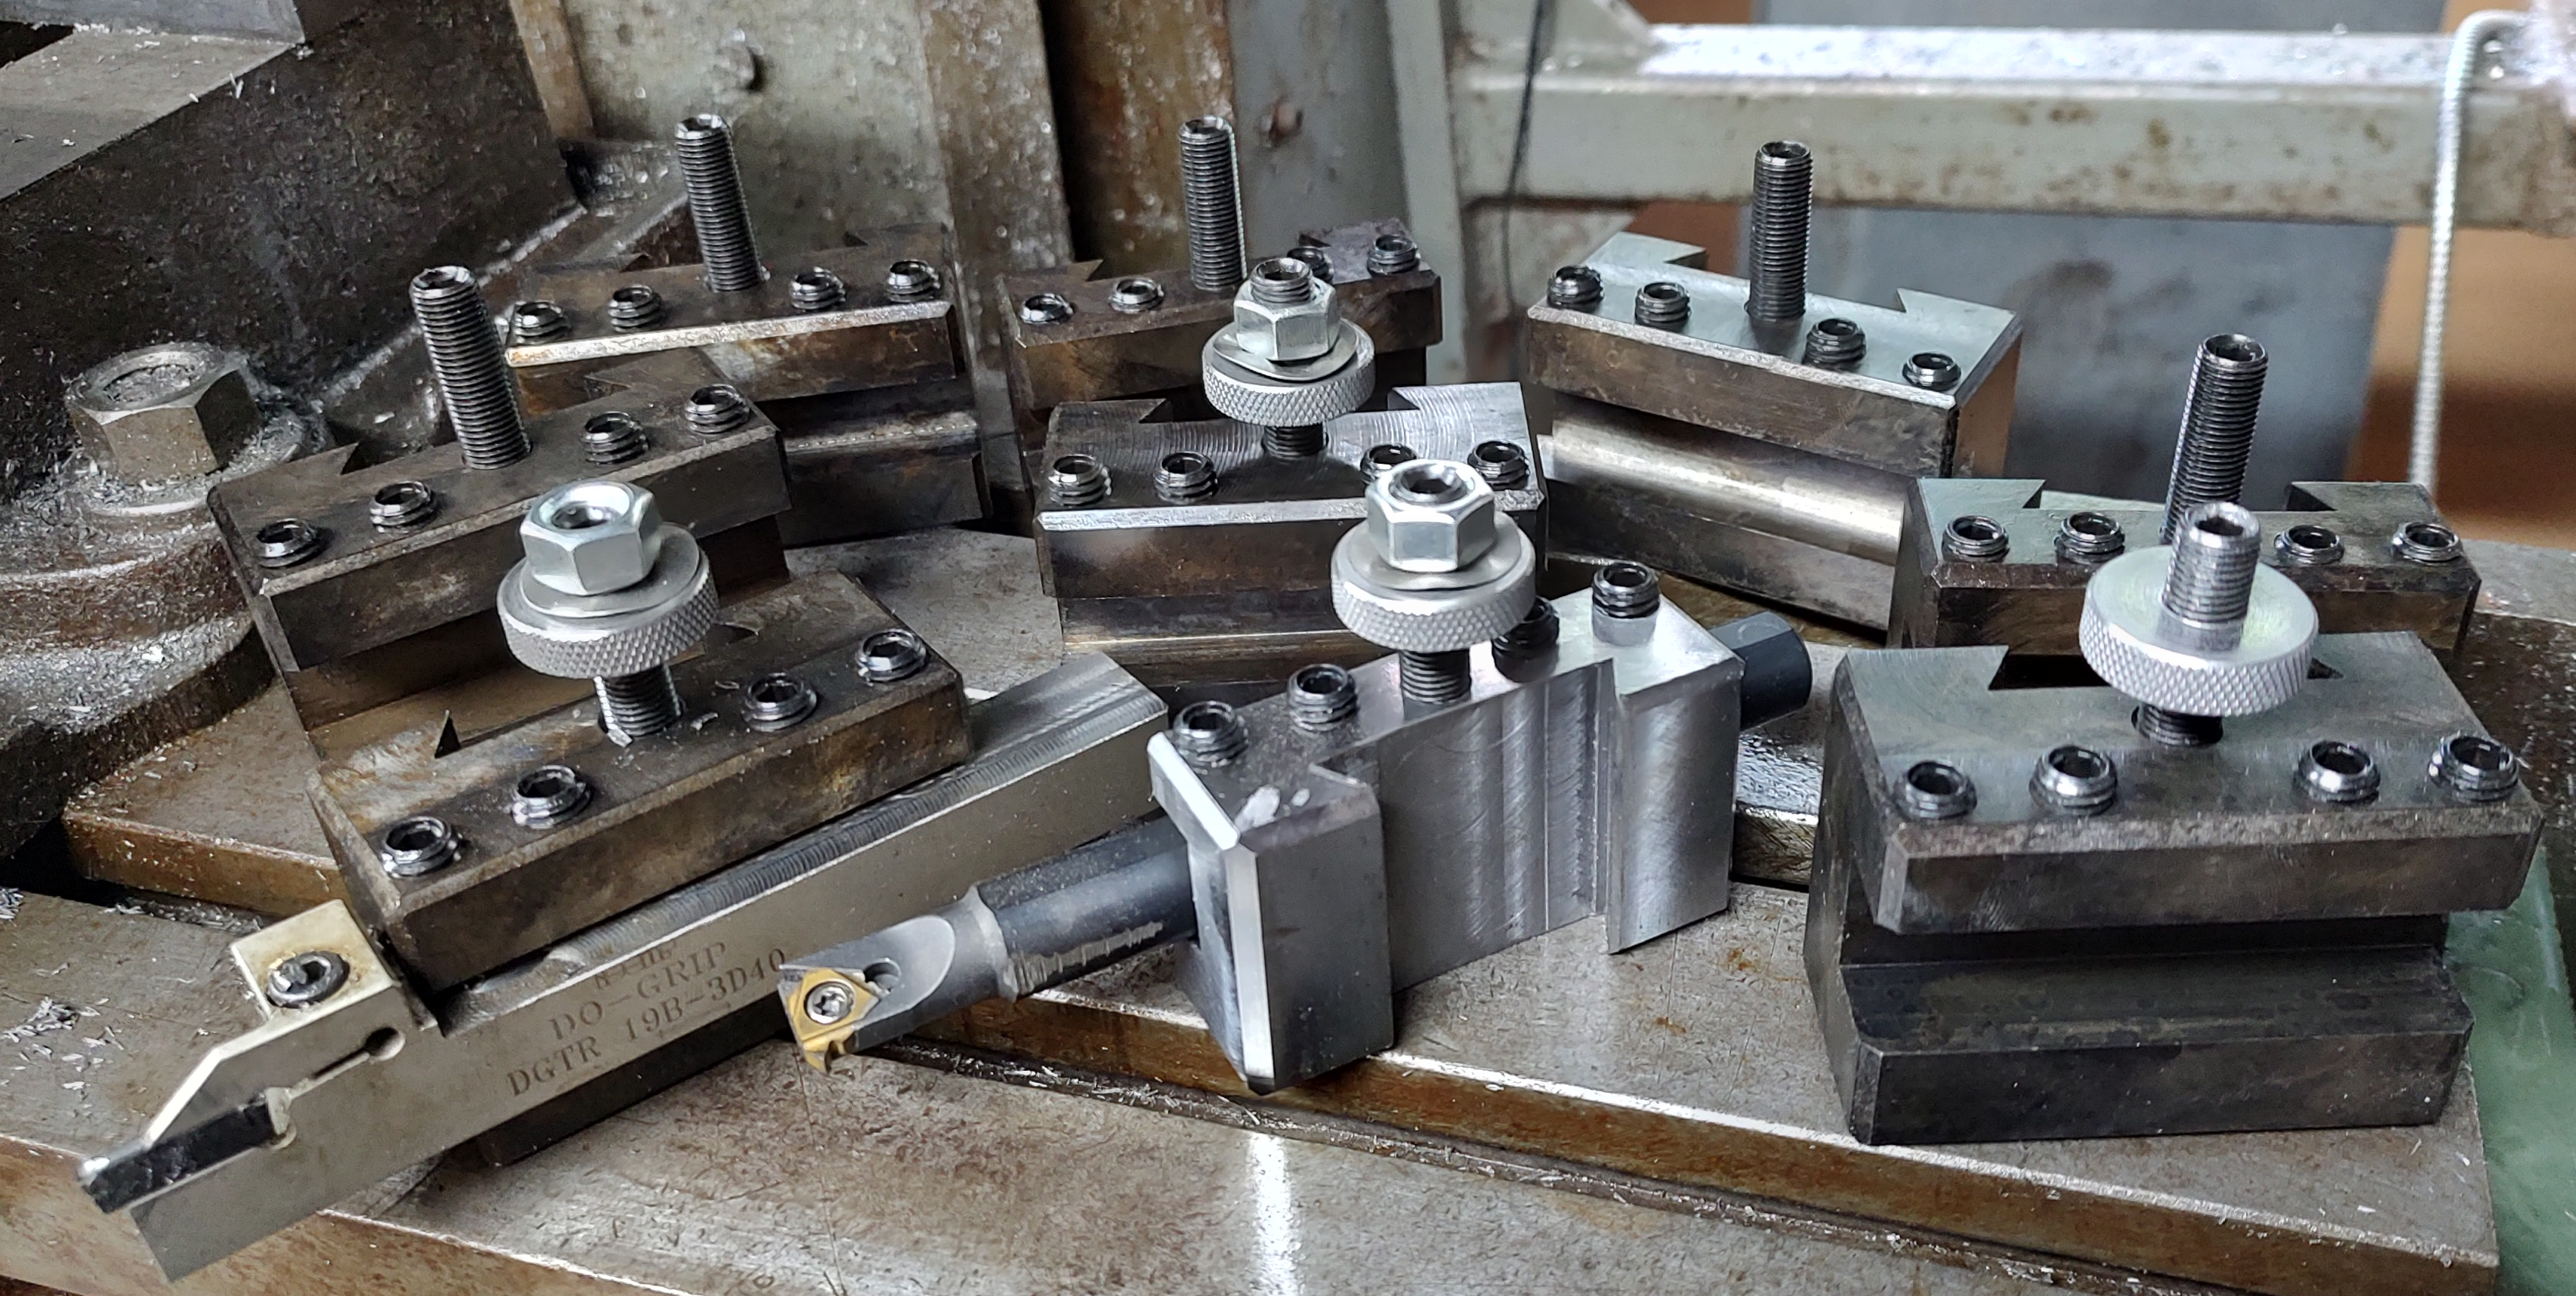
Yesterday, I finished the machining on the toolholder bodies. I need to make 5 adjustment nuts to complete the project. This means there are four toolholders that are good to go, as is.
Comedy of Errors
I do not think there is a single toolholder that is 100% right. There is the one where the tool in the collet grabbed it and chewed on the edges.
There are the three where I cut the dovetail 0.100 too deep.
There is the fact that the adjustment stud is too close to the dove tail. There are the edges where I missed the chamfer and have a ridge where there should be none.
Which takes us to
Hot Bluing
This was so much fun, not.
The formula that I used was 13 cups of water to 4 lbs of sodium hydroxide to 2 lbs of sodium nitrate. Bring to a boil, cook each piece of metal for 30 minutes. Rinse in hot tap water and then coat with WD40 or other oil.
First, I purchased a 5 qt stainless-steel pot to do this in. The stainless-steel handles were attached to the body of the pot with aluminum rivets. This formula will eat aluminum in short order.
Which it did. The pot sprung a leak and the boiling, caustic bluing mixture went everywhere.
I have more cleanup tomorrow to recover from that mess. That stuff started eating my hot plate.
As prep for each piece going in, I first deburred them all, used air to clean them, washed them in the parts washer, used air to dry them. Then Hagar cleaned them with acetone.
I don’t think we got them clean enough. We should have used more acetone and got them 100% oil free.
After they were cleaned, they were hung from spring wire in the pot for 30 minutes. Then rinsed under hot tap water for 2 or 3 minutes.
Finally, they were sprayed down with WD40. I then used a Scotch Bright(gray) to lightly rub the flash rust from them. The results are what you see.
I think they are beautiful. They are not that deep black I was looking for. They have a sort of case-hardened look to them.
Yes, one of them is still in the white. I forgot I had three machined, so it wasn’t processed into the pot.
Next time, I will clean each part better. I believe that the aluminum might have reduced the quality of the bluing solution.
We’ve put it all in a jug for use next time. I might have to remake it, making sure not to get any aluminum in the solution.
It is amazing watching aluminum bubbling away…
If you haven’t already done so, I recommend that you watch Anvil Gunsmithing’s (Mark Novak from C&Rsenal) videos on controlled rust bluing. Seems like it would be a good alternative to hot bluing.
I considered using Mark’s method, but it requires you to be able to reach everywhere. There were some threaded holes where that was a question. I did use his wipe down method to get the results I did.
.
Overall, I’m happy with how they look.
A long time ago, I did hot salt bluing. We used a degreasing solution made from “I think” TSP and water.
The solution had to be boiling to work, but it did remove all of the grease.
Well… As AWA mentioned, I was there. Silly me, I volunteered to help him with his acid stuff. Remind me not to do that again LOL… So I was bringing the water up to temp, and slowly adding the various “stuff”. I noticed that one (and only one) of the screws holding the handles on was “bubbling”. It looked like it was boiling, and I mentioned it to AWA. He looked and said it wasn’t a big deal, so I moved on. It wasn’t until a few minutes later, when I looked to see why things were smoking, that I discovered there was an actual hole forming. Acid stuff was beginning to leak out of the hole!
.
I ran into his house, got stuff to clean up with, ran back only to find that the acid stuff ate through the entire screw and all that was left was a hole, which was spewing (slowly) all over the place. There I was, trying not to touch anything (I had on gloves and a work apron, and glasses, and I’m sure I looked just awesome), dabbing up liquid acid. AWA had stressed to me the day before, when we were talking about it, that this stuff was dangerous. So I treated it that way. It wasn’t until much later that I found out it was indeed something to be careful of, but not “burn through to the center of the earth” or anything. Oy. I had spill padding down on the floor, was wiping things off of the machine the hot plate had been sitting on, and then under the hot plate because not only did the acid eat through part of the hot plate, it then puddled underneath and was stealthily making its way toward other things sitting nearby.
.
I got most of it cleaned up, and used a stainless steel ladel and rubber/plastic funnel to get the excess liquid into a container designed to hold the acid. It was definitely NOT fun.
.
I want to say for the record that I thought there was too much “stuff” to fit in the pot, and I was right. But only because the screw got eaten through. That was… impressive. The only thing left of the screw by the time I got back from grabbing the ladle was the domed top of it, which I scooped out and disposed of appropriately. The other three screws appeared untouched. I have no idea if that one was aluminum and the rest were steel… or if that one had bad sealing around it and it failed and the others didn’t… or what. But yeah, impressive watching it come apart sort of like chocolate melting in a pot.
.
Next time I need to really scrub with the acetone. I rubbed down every surface (even using a q-tip in the holes) with the acetone, but I clearly needed to do more. It will definitely need more than just a wee squeeze bottle of acetone though. 🙂
I’m surprised it ate your hot plate. Aren’t those things made of iron?
Aluminum is an interesting metal. My high school chemistry taught me it’s “amphoteric”. That’s chemist-speak for “swings both ways”. It will dissolve not just in acids, as most metals do, but also in strong bases like sodium hydroxide.