
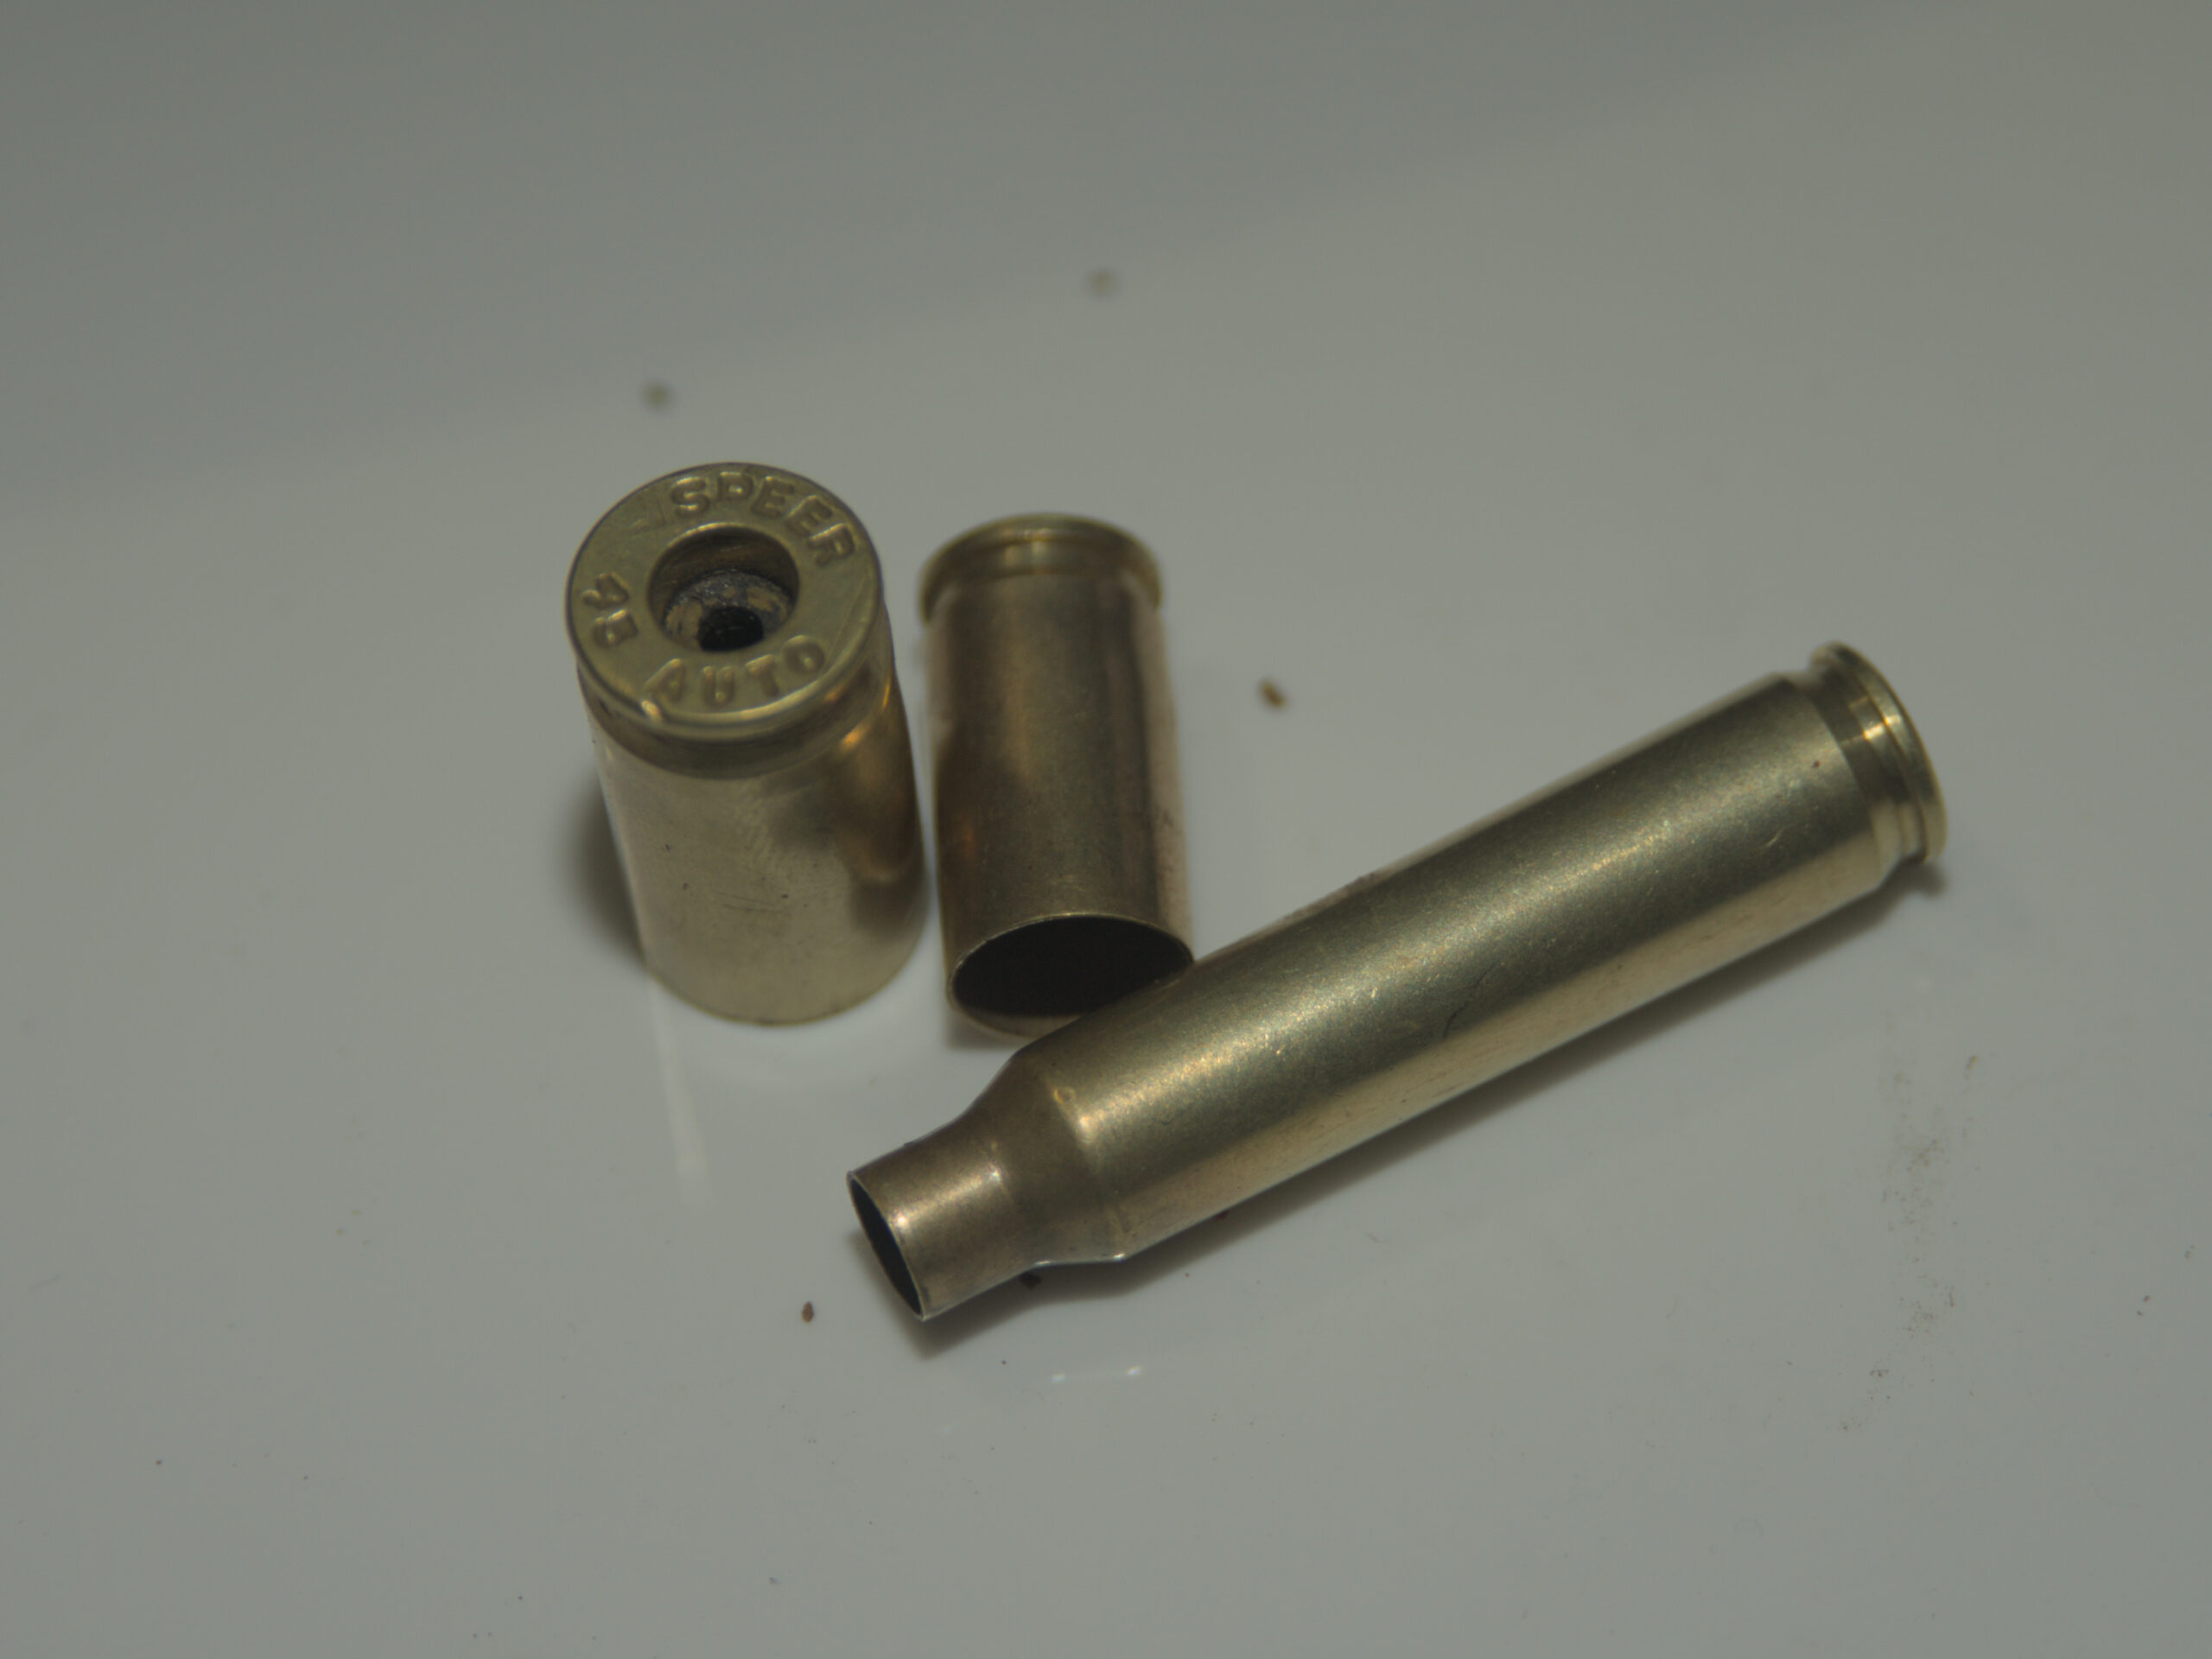
Case preparation starts with getting some brass. In my situation, that is range brass. This is brass that I’ve picked up off the ground at my test range or the shooting range. The only thing I know about this brass at this point is that it is brass and not aluminum or steel.
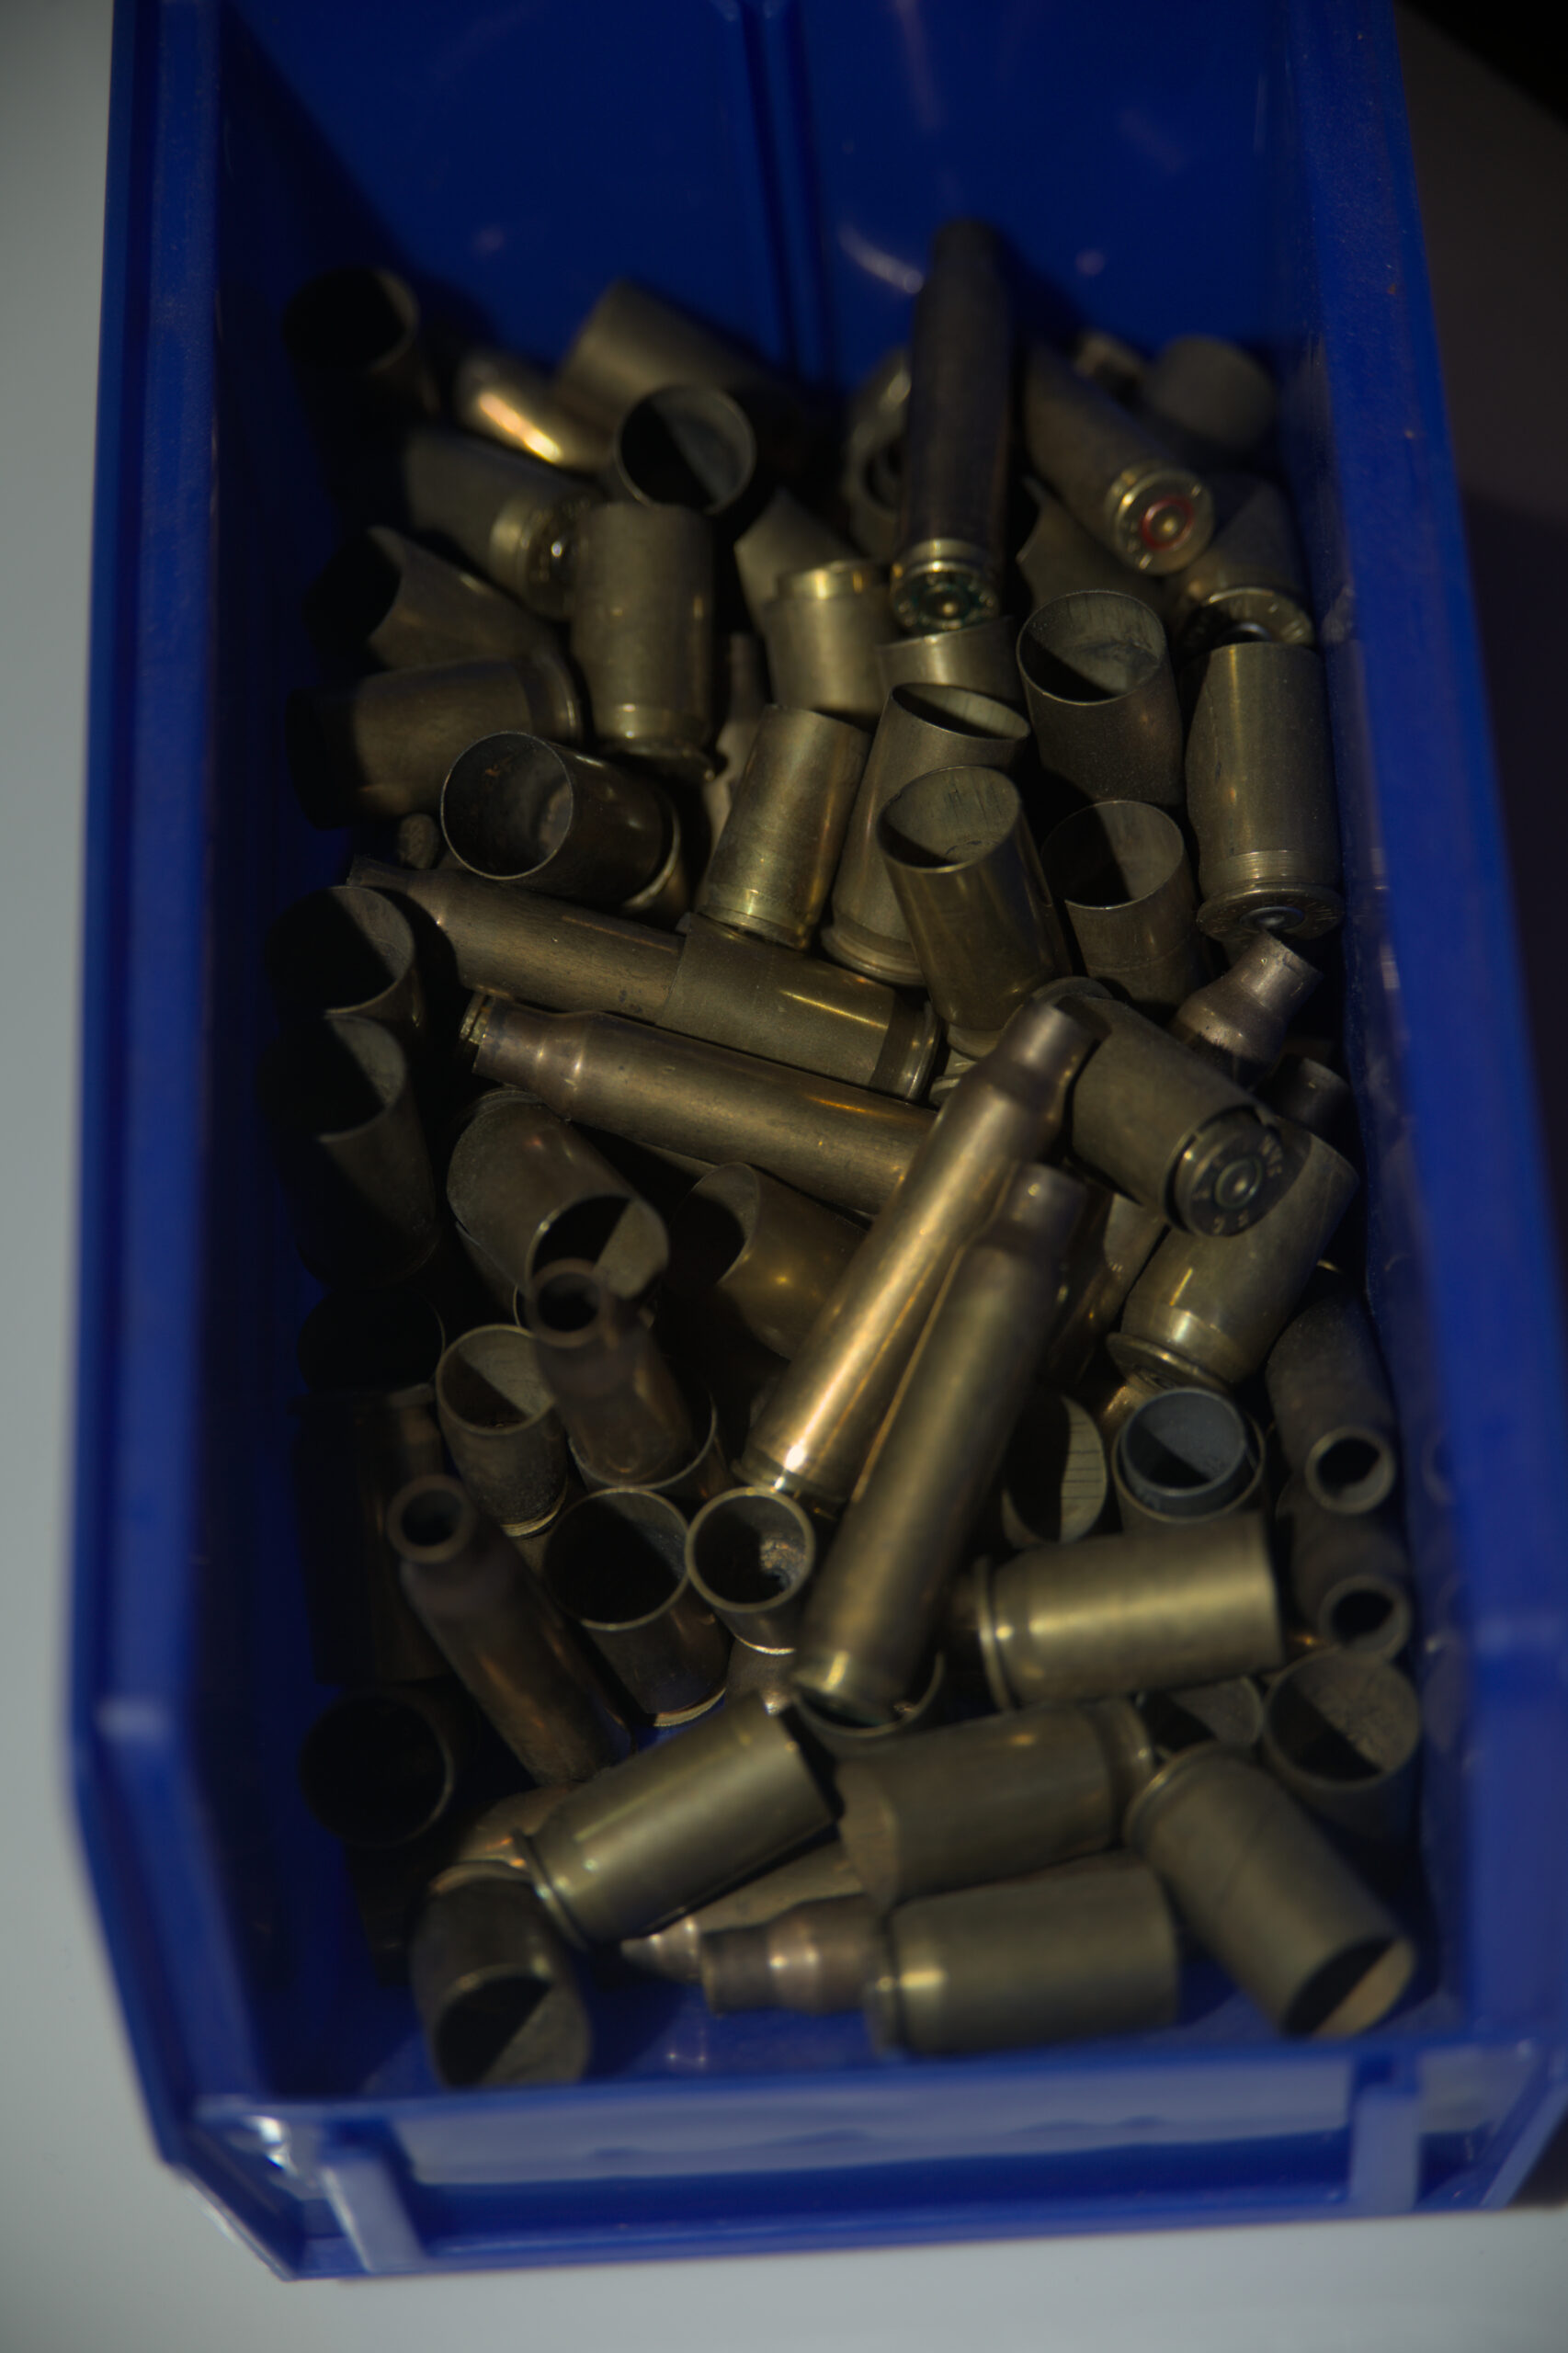
Notice the green sealer around the primer of the top 5.56×45 case. This indicates that this was likely a military specification round. That sealer is designed to keep water out. The primer is also “crimped” or “staked” in place.
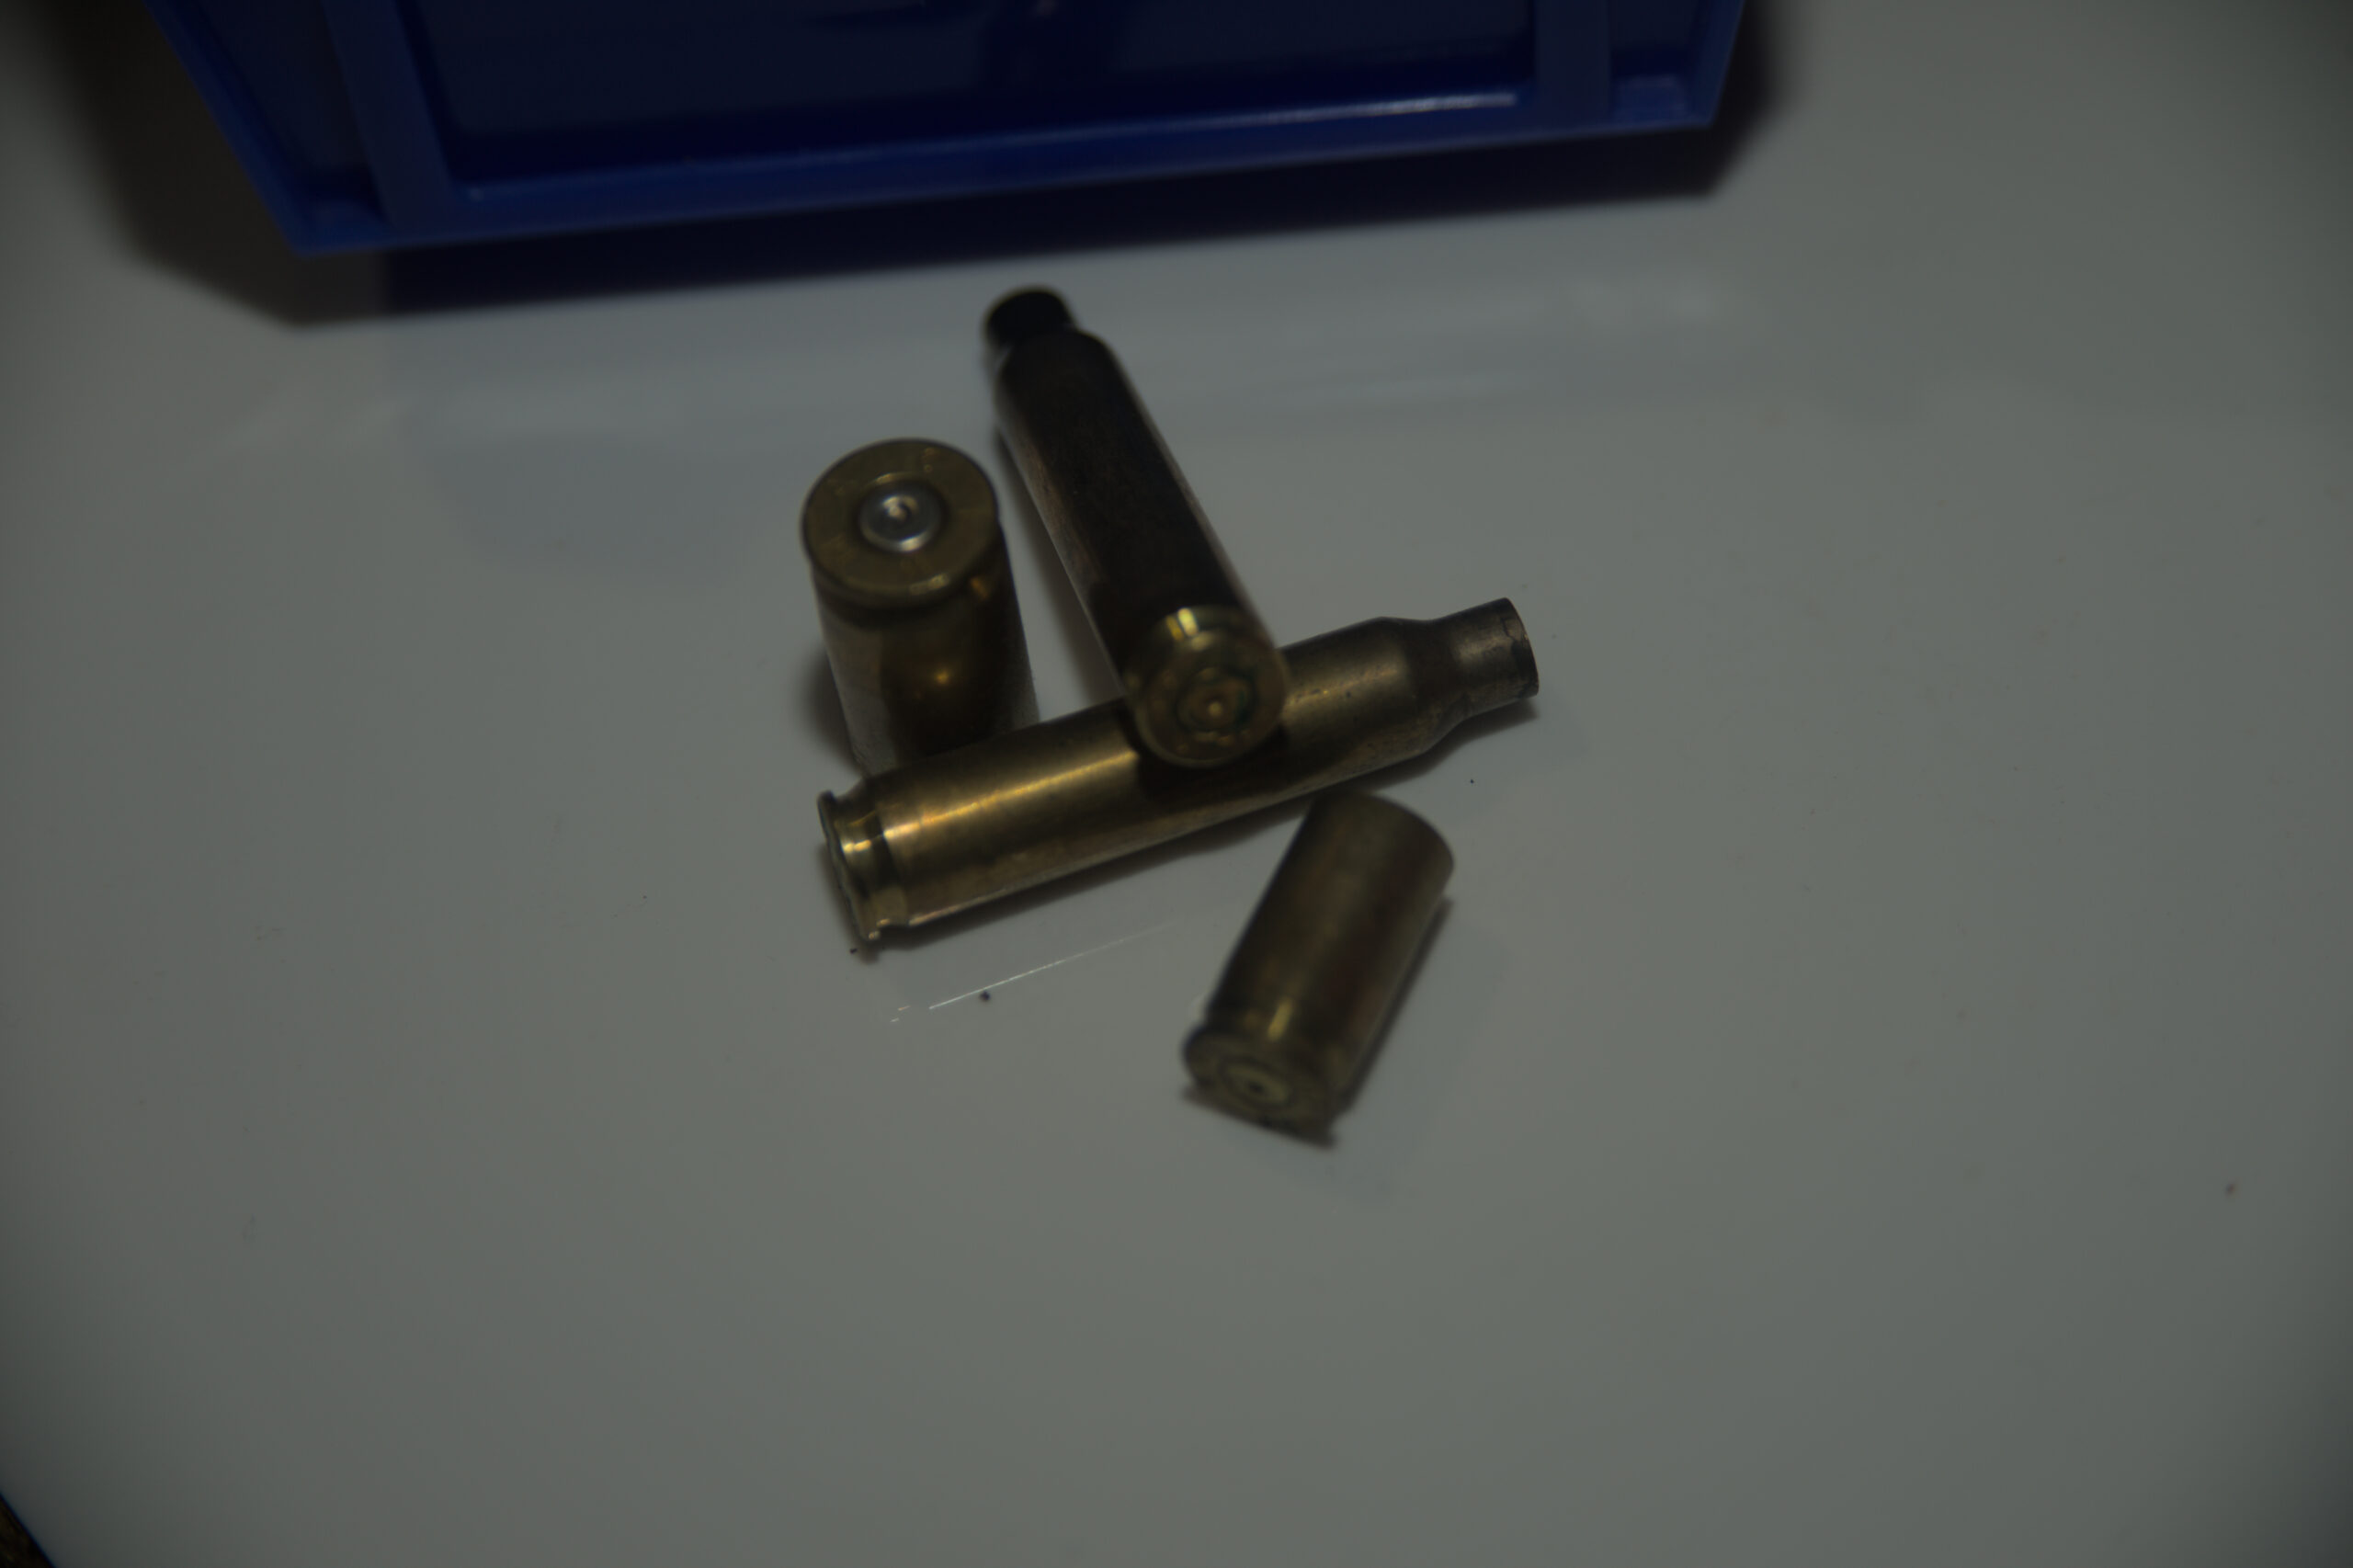
My first step is to decap the cases. These were done with a hand decapping tool made by Frankford Arsenal. For some of the military primers, it took significant hand strength to pop out the old primer. For others, no amount of hand strength would have been enough. They were berdan primed. I even had on 9mm berdan primed case.
Notice the red sealer on the 5.56×45 case. This indicates that it was manufactured for the military. Also notice the small brass circle inside that red sealer. This suggests to me that this case was converted from berdan primed to boxer priming.
Now that the cases have all been decapped, they go into a vibrating cleaner. I’m using walnut media and a polishing agent.
After one hour.
After two hours.

After three hours.
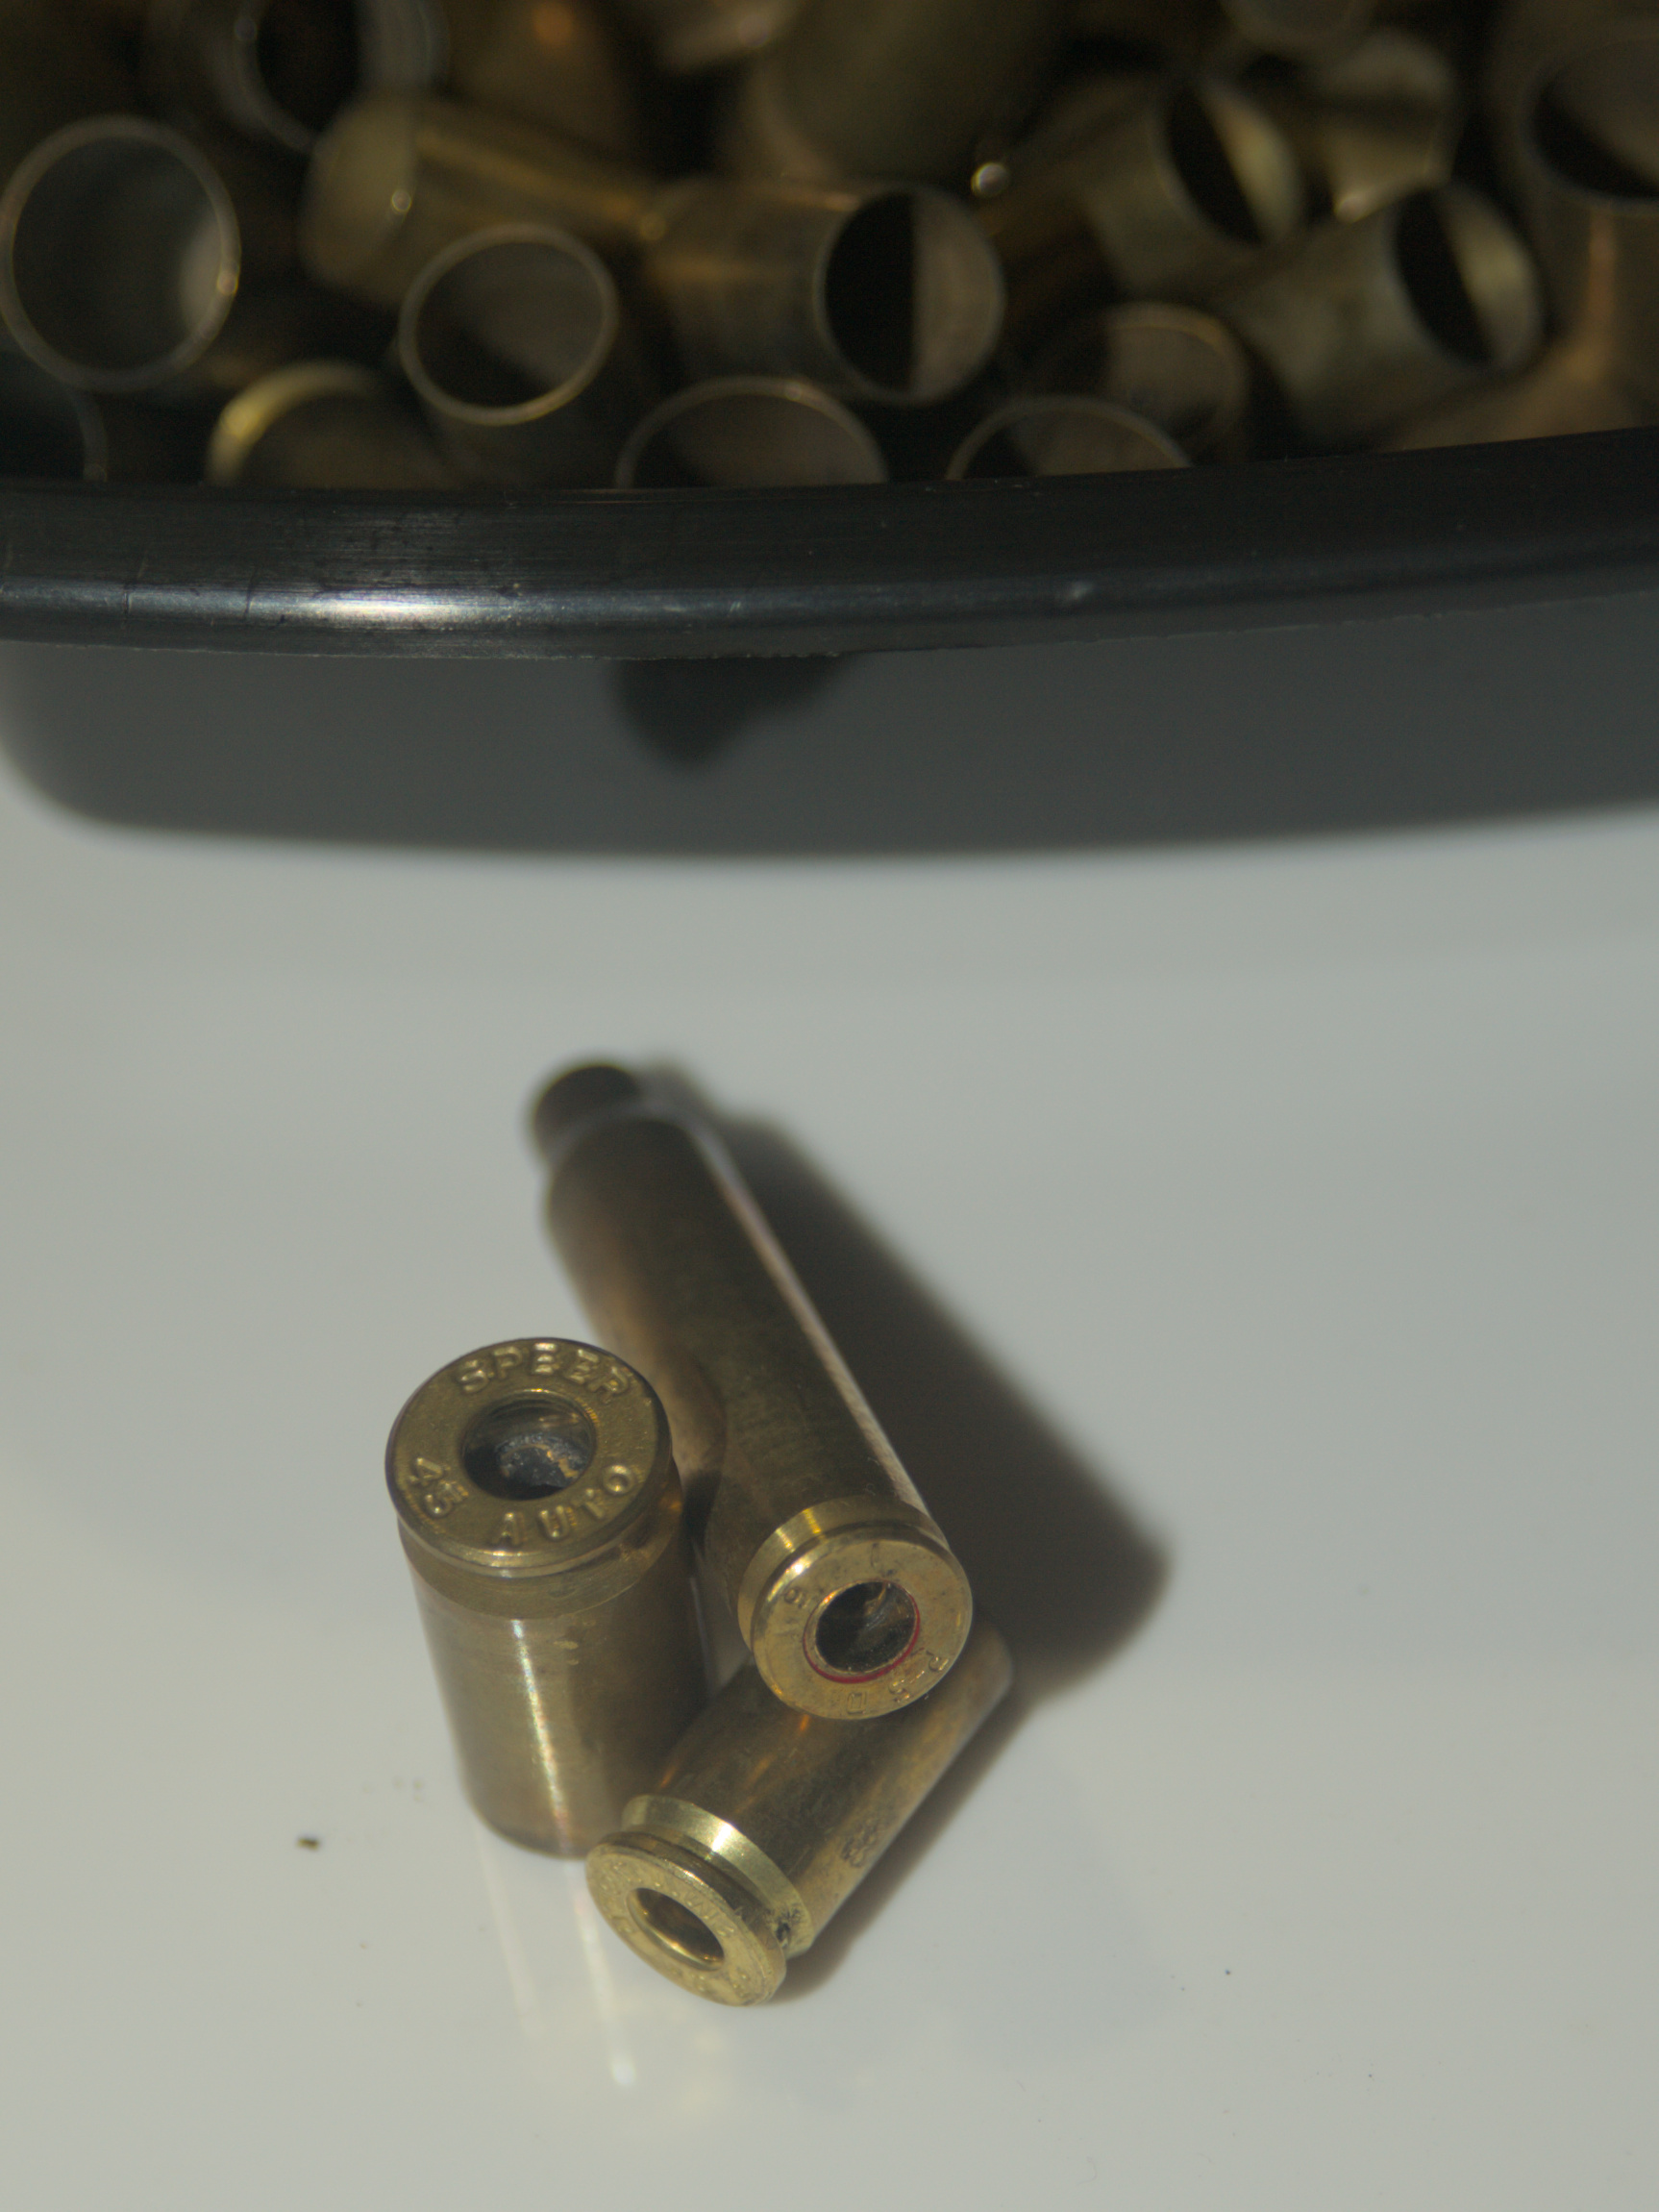
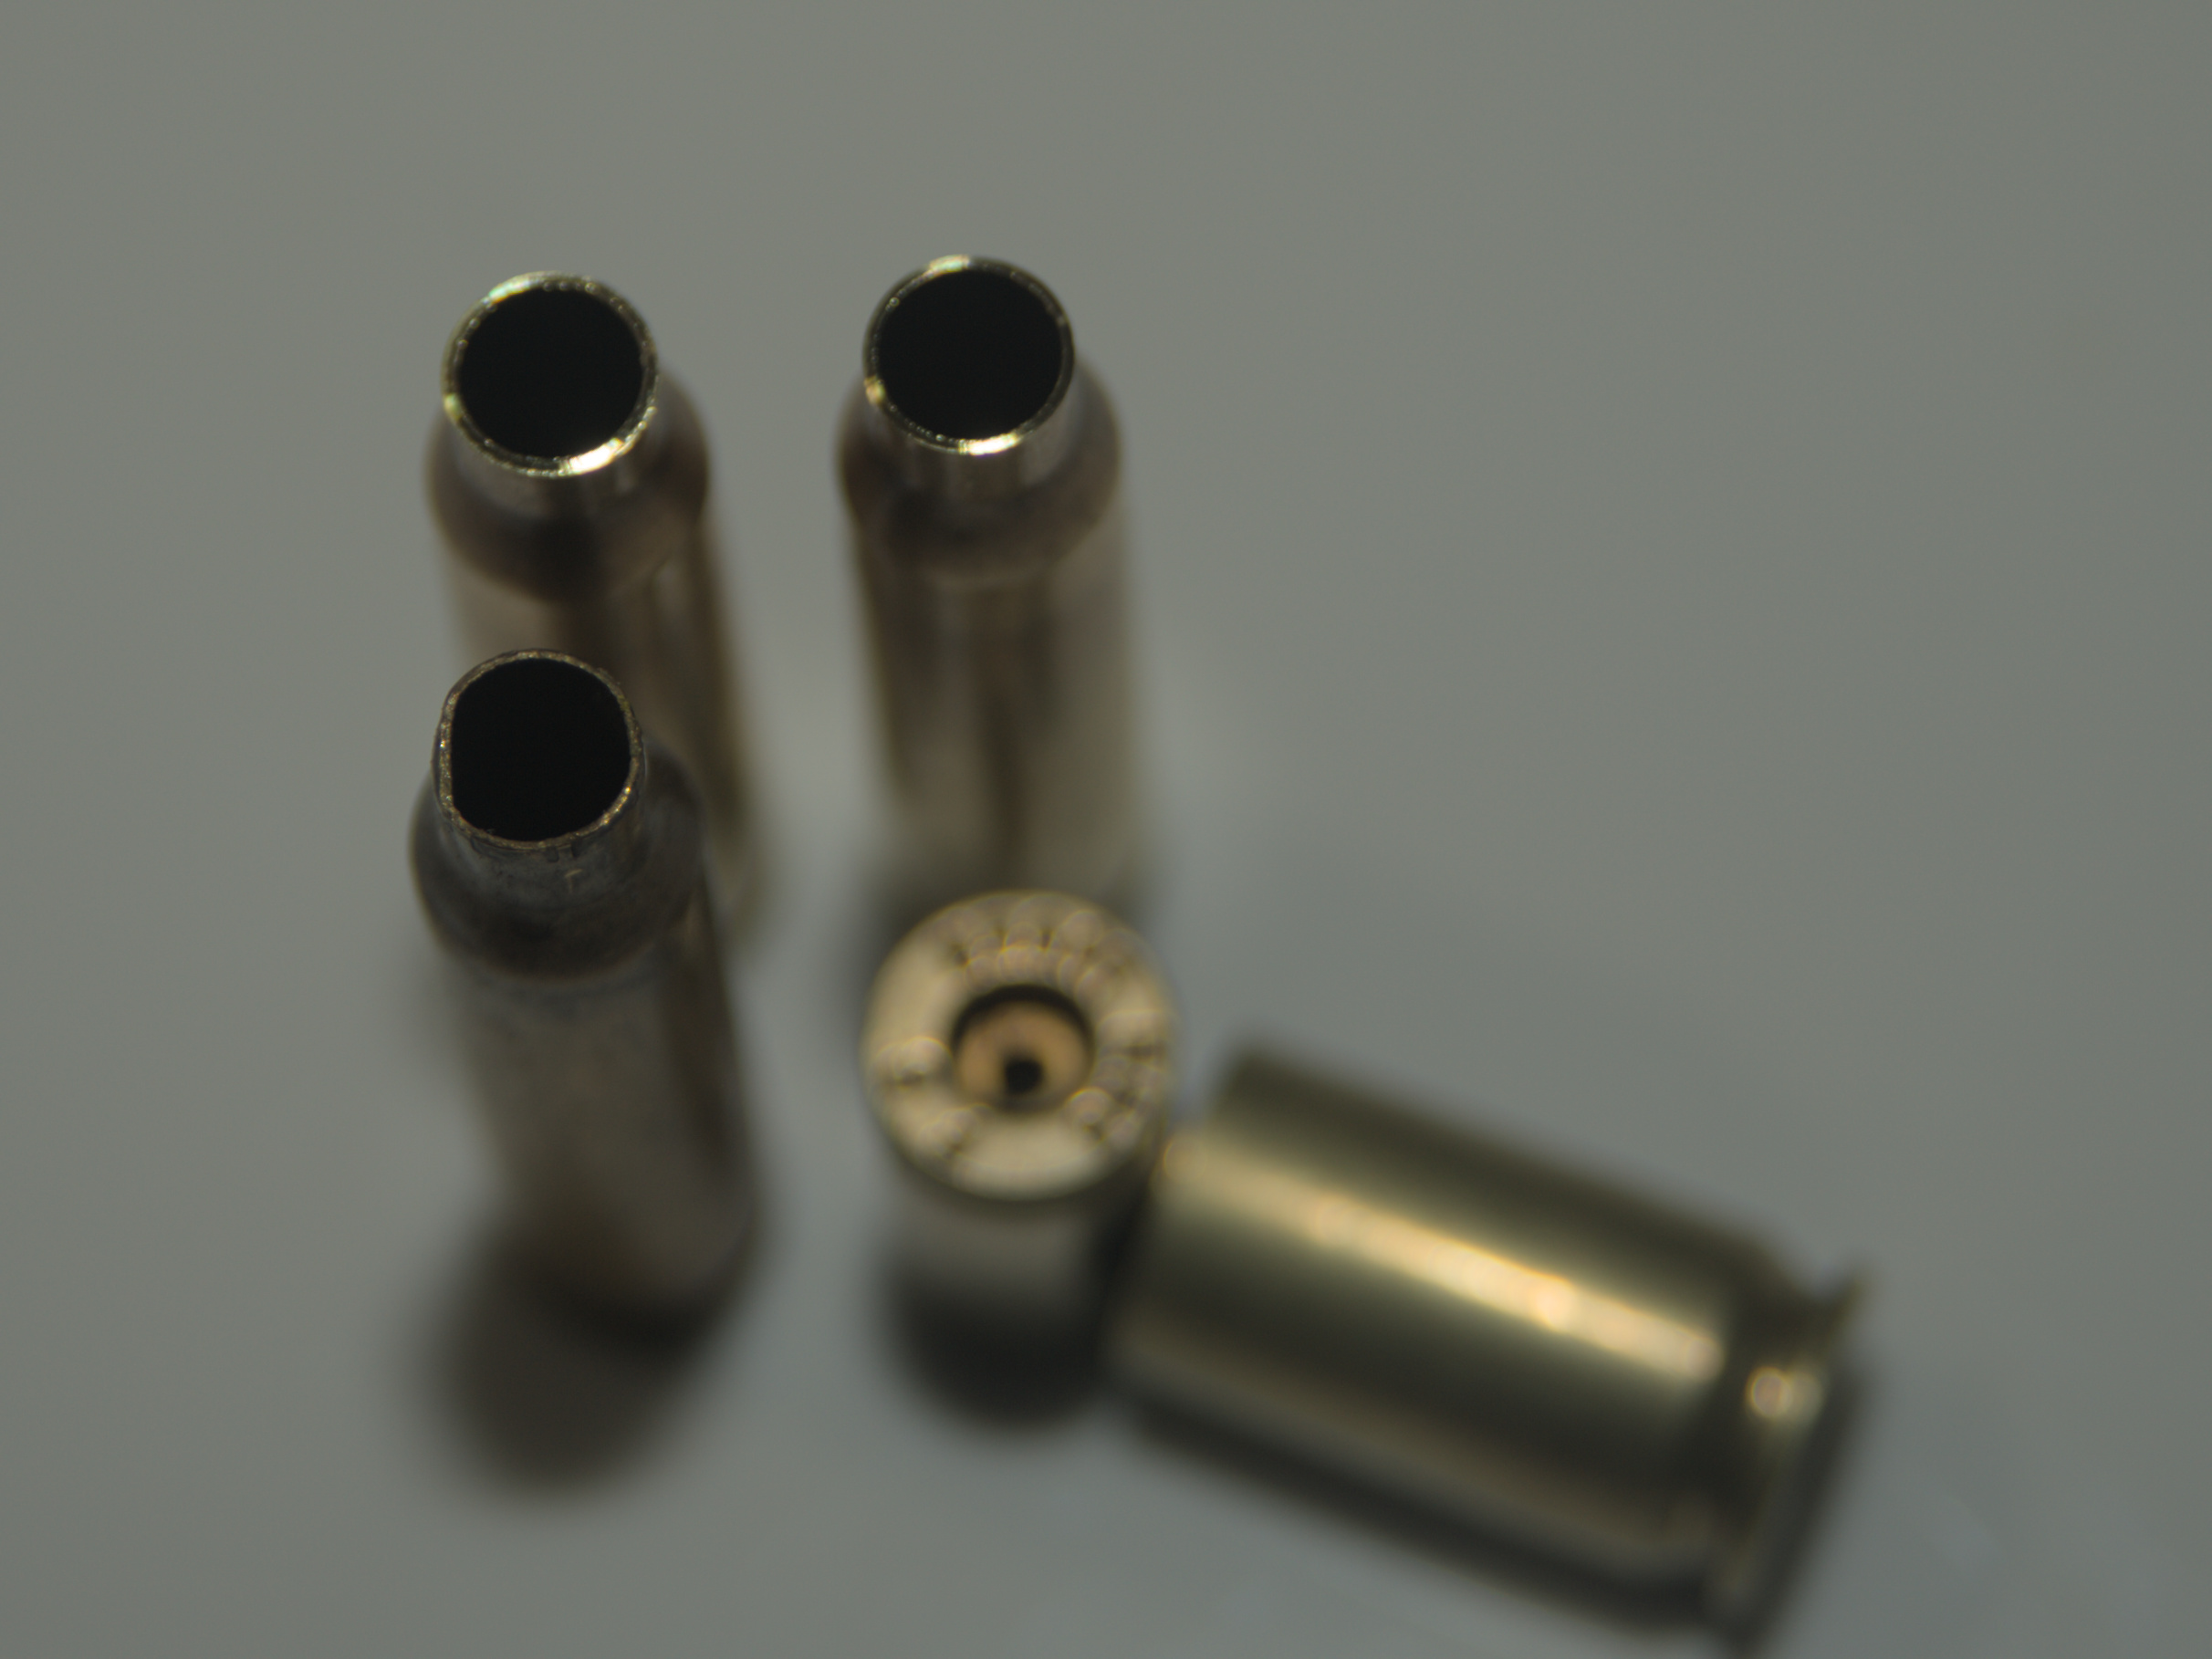
In this last image, I have put one of the berdan primed 5.56×45 cases in the image. You can see the way the cases cleaned up.
The longest I’ve used a vibrating tumbler on brass was 5 hours. That did an impressive job. The downside is the media has to be replaced and without the polishing liquid, they don’t clean up well.
I also have a ball mill that I use for wet cleaning/polishing brass. Using the ball mill takes a bit longer, but the results are astonishing. Unfortunately, it will take the nickle off nickle plated brass. With that method, you put your brass into your tumbler/mill, add stainless-steel media (pins), add enough water, enough Dawn liquid dish soap. You tumble for 30 minutes.
Change out the water with more water and soap and tumble for 30 more minutes.
Change out water a third time, this time with LemiShine(?) and tumble for 10–15 minutes
Change the water one more time, again with the LemiShine and tumble for 10–15 minutes.
At this point, you are done. Rinse the cases, separate out the media. Dry the cases and you are ready to go.
I use a food dehydrator to dry my cases. Set on low.
There are two trains of thought on cleaning cases. One train is that you clean before you decap, the other is to clean after decapping. The idea being that you want to clean the primer pocket and that you don’t want to contaminate your media with gunk from the primers.
The advantage of decapping first is that you do get the primer pocket cleaned when you wet tumble and partially cleaned when you vibrate clean. The disadvantage is that it adds another step to your case processing.
Now that I have cleaned the cases, I run them through the sizing die to bring them to the correct specifications.
When you fire a round, the brass case expands under the pressure to be a perfect match for the chamber of your firearm. Since the chamber must be slightly larger than the cartridge, this means the case is now also slightly larger than when it started.
The case stretches just a little bit.
When we size a round, we squeeze it back into shape. That process causes metal to move. For bottleneck cartridges, it causes the length to expand. This happens a little with straight walled cartridges, but not as much.
Having sized the cases, I have to check to see if they need to be trimmed to size.
Looking up the maximum case length in my reloading manuals, I find that 5.56×45 the maximum case length is 1.760 inches. I set my calibers at 1.760 inches and attempt to pass the cleaned cases between the jaws. If it doesn’t go, or almost doesn’t go, the cases need to be trimmed.
The two cases in question passed this test at 1.764 and 1.765 inches. For this article, I resizedtrimmed them.
Using a trim tool, I resizedtrimmed the cases to 1.750 inches. The normal sizing size is 0.010 inches less than the maximum case size.
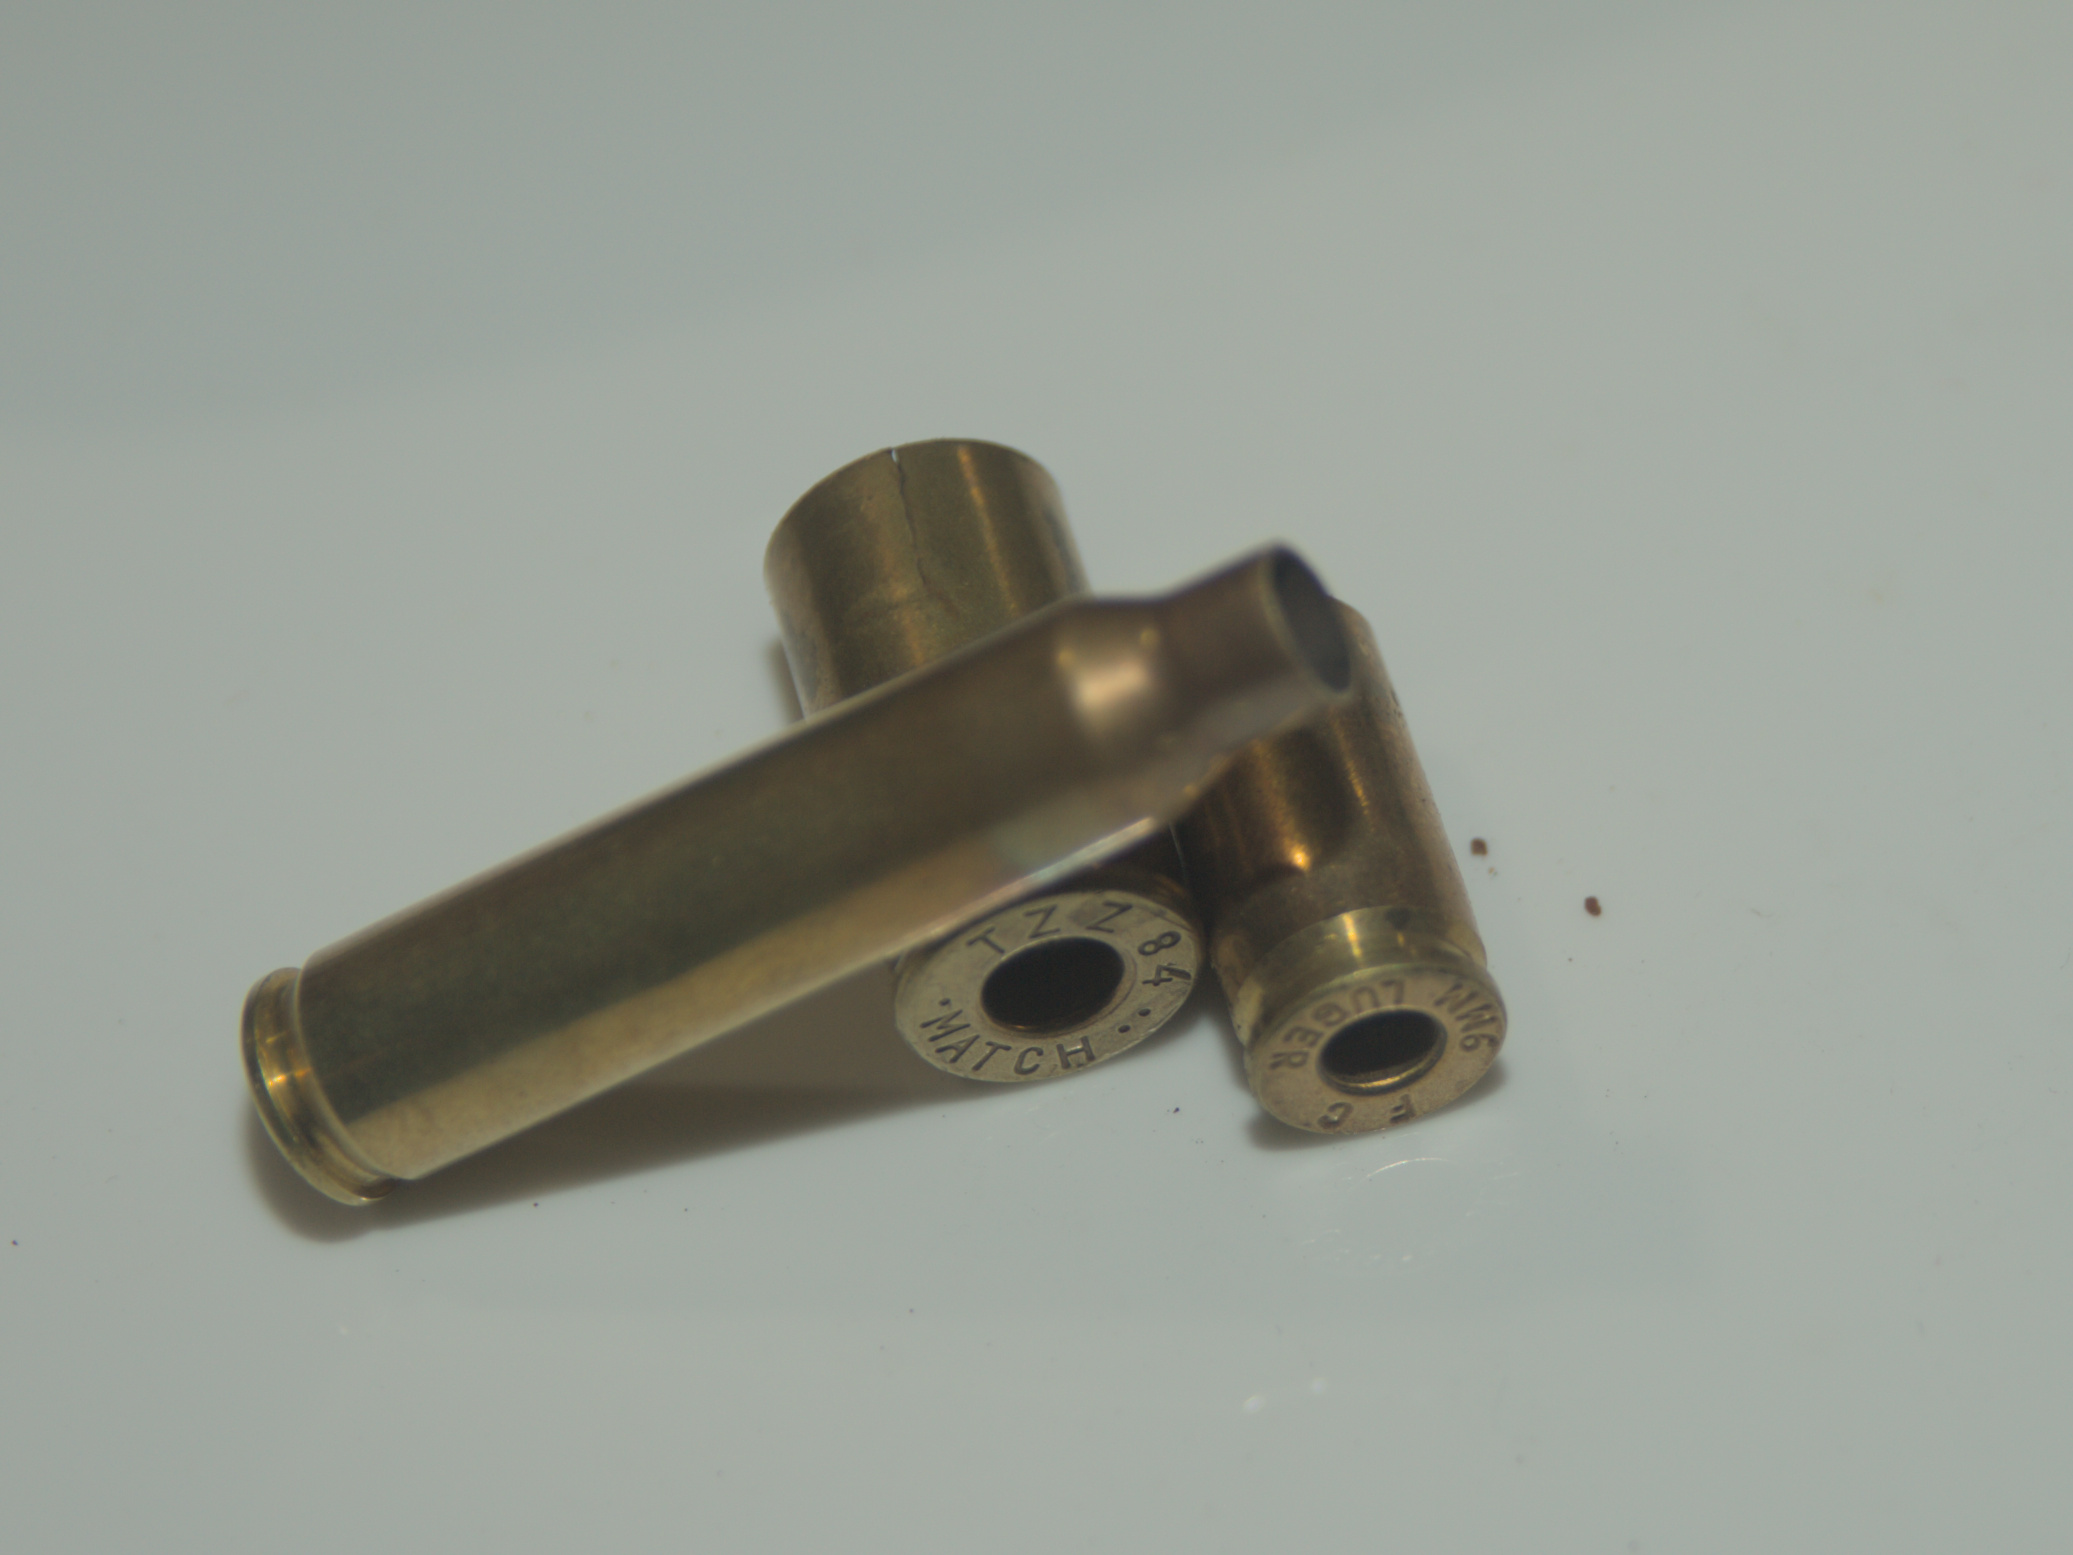
Here, the top two cases have been sized and then trimmed to length. You can see the bright lips of those two cases. When you compare the thickness of the lips with the unprocessed case, you can see they look thicker.
This is because they are thicker. The process of trimming cases will cause a burr to be created, both inside the case mouth and outside. You can easily feel the outside burr.
You can also see that the unprocessed case is out of round. This is normal for range brass. Running that case through the sizing die would make it round again.

The wrong case is in focus, sorry. You can see, in the lower left case, that it is now the right thickness. You can see the shine on the inside of the mouth of the case. This is after I have deburred the outside and then the inside of the case. This case is almost ready for loading.
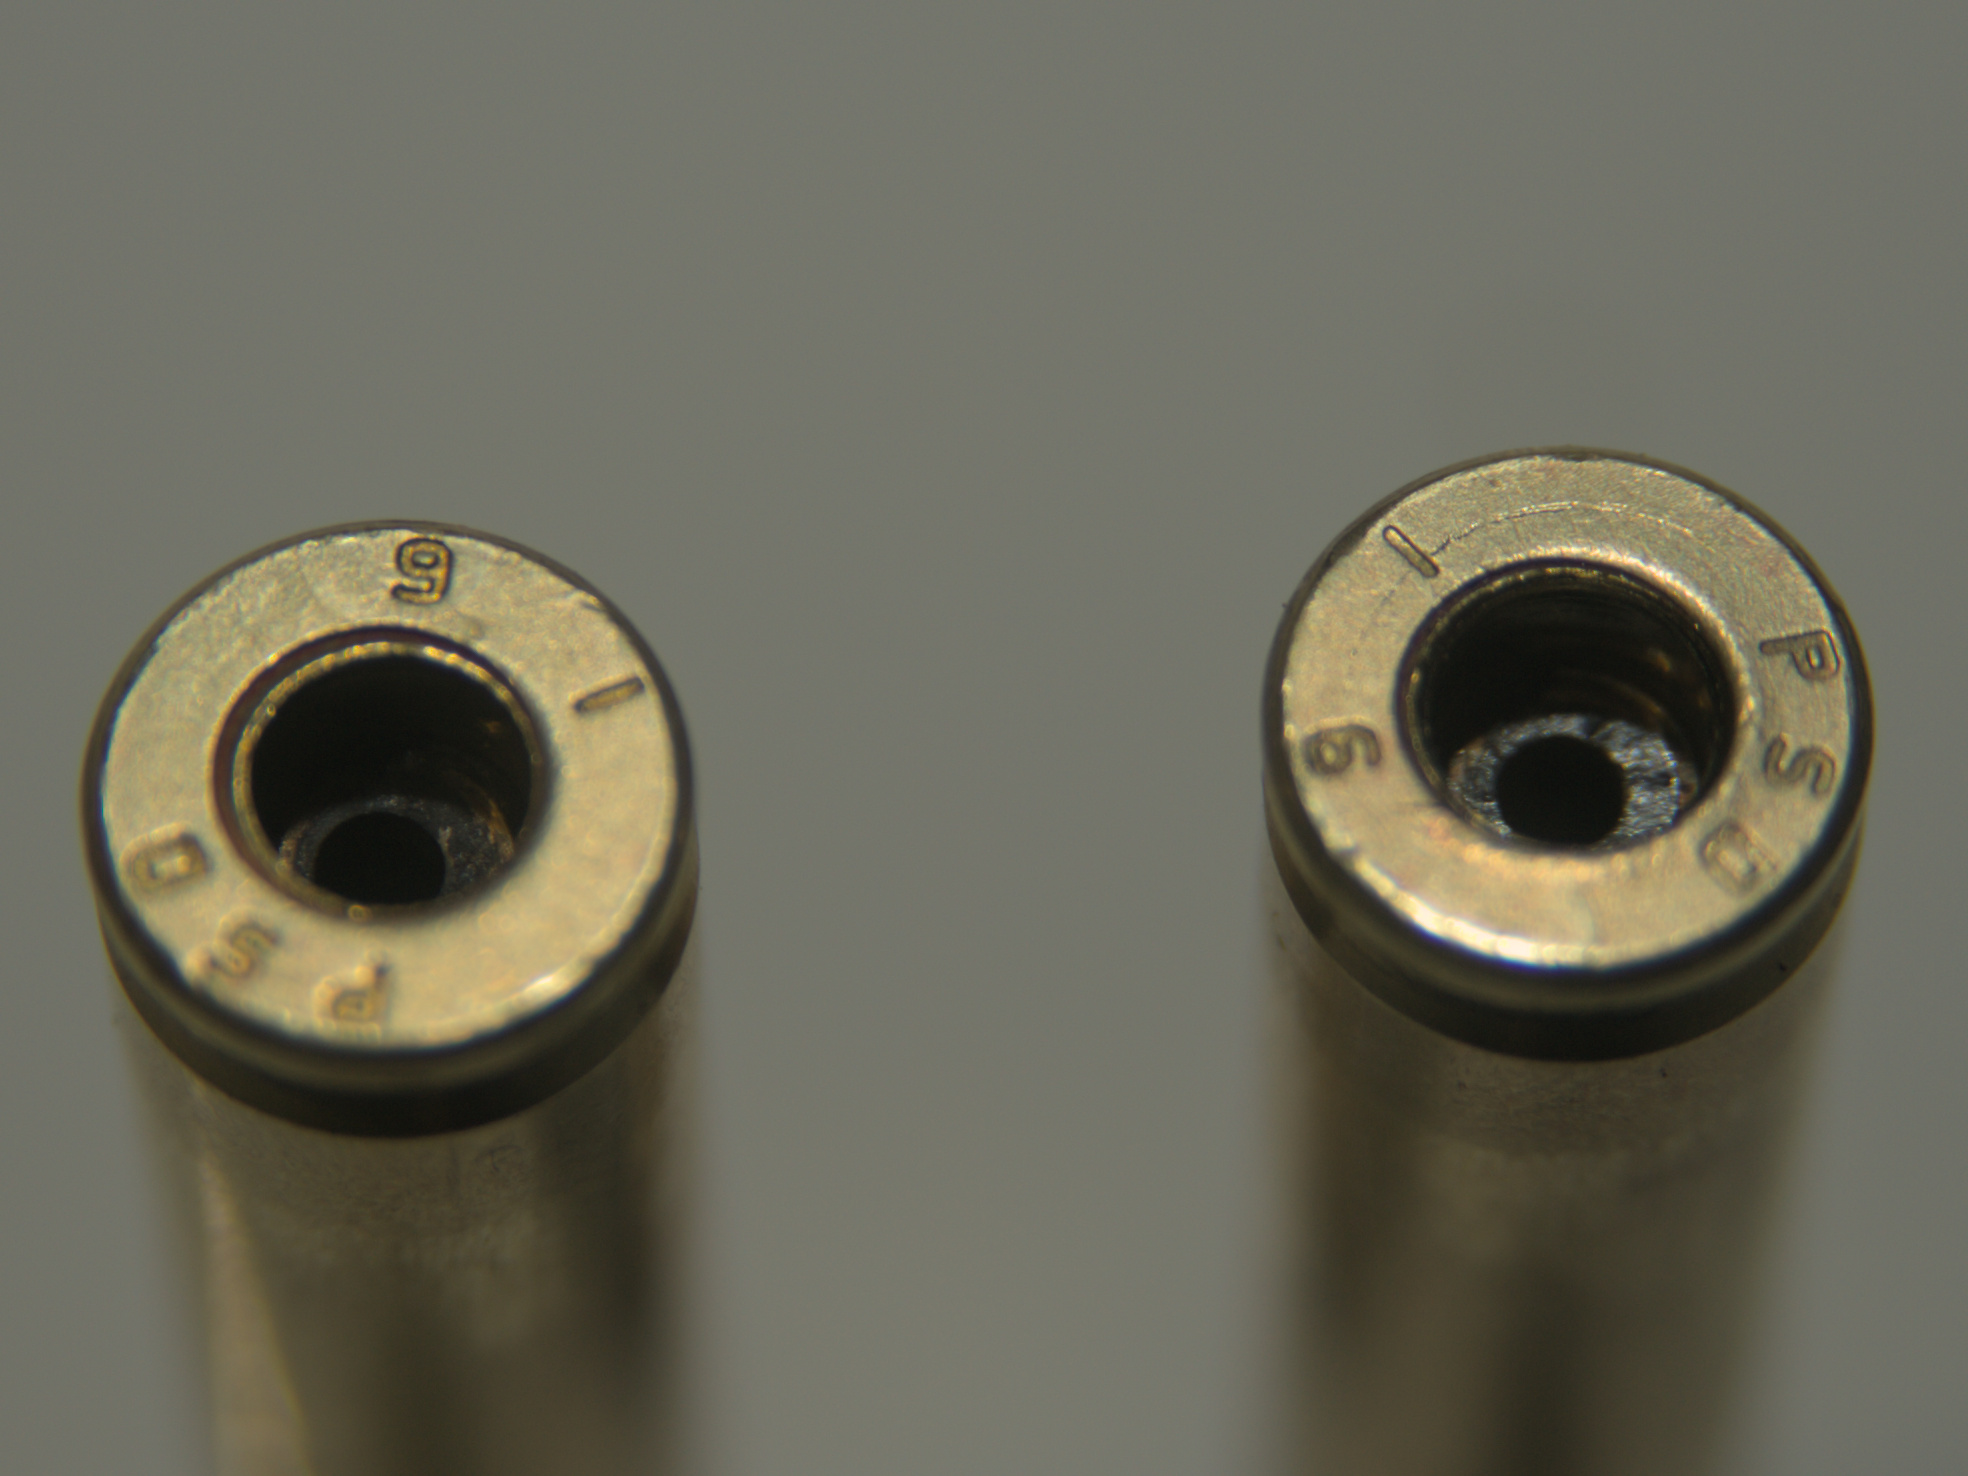
The case on the left has had nothing done to the primer pocket. The case on the right has been swagged. Look at the edge of the primer pocket on the left, it should appear sharp to you. The inner “cup” is also sharp.
When compared to the primer pocket on the right, the sharp edge to the pocket is gone and the inner cup walls seem to be thinner. This is what swagging does. It pushes metal to size the primer pocket “perfectly”.
If the primer pocket is too small, you have to first remove metal to bring it closer to size, then you can swage it to size.
The case on the right is now ready for the reloading process: prime, charge, seat bullet, and crimp bullet.
Response to Comments
Birdog357 asks for 9×19 price breakdown.
I looked up 1000 rounds of 9×19 JHP, defense grade. (Cheating, I know)
| Price | Quantity | |
|---|---|---|
| 9MM 115 GR RMR JHP | $112.00 | 1000 |
| CCI #500 Small Pistol Primers | $79.99 | 1000 |
| Hodgdon Titegroup | $27.99 | 1 lbs |
| Grains per | 4.6gr | |
| Brass | $29.00 | 1000 |
| Number of uses | 5 |
| Item | Cost |
|---|---|
| Bullet | $0.112 |
| Primer | $0.079 |
| Powder | $0.018 |
| Brass | $0.006 |
| Total | $0.216 |
| 1 | 10 | 50 | 100 | 500 | 1000 |
|---|---|---|---|---|---|
| $0.1039 | $1.038 | $5.192 | $10.385 | $50.192 | $103.850 |
| Corrected | |||||
| $0.216 | $2.162 | $10.809 | $21.618 | $108.092 | $216.183 |
| Source | Cost | Quantity |
|---|---|---|
| Midway USA | $22.49 | 50 |
| $429.99 | 1000 | |
| Bulkammo.com | $359.00 | 1000 |
RHT447 has a long comment regarding his experiences with reloading for many years, more than I have.
Single stage press. By all means, start here. Learn each reloading step in detail. Even today, I do 95% of my reloading on my RCBS Jr. that I bought in 1976. (Side note– I bought it mail order while stationed in West Germany. Called my dad back home and told him to expect a big heavy box, and to just set it in the basement and I would open it when I got back in two years.)
One of the big advantages of a single stage press is that I can have it up and running for any caliber in under 10 minutes. The same for adjustments to accommodate some new bullet, or new gun chamber length. It is also easy to spot/correct a mistake. It stays mounted to my work bench. I usually load in batches of 50 rounds because that is what my MTM ammo boxes hold. I find it handy to use stick-on file label on the box tops to keep a record of times fired and times trimmed.
The one progressive I own in an old LEE 1000 three station. It is mounted to a chunk of ¾” thick plywood that I clamp to my bench when I use the press. I only use it to load handgun ammo, and then only for 100 rounds or more. It is a love/hate relationship. (Yeah I know, get a Dillon). A progressive press takes more time to set up and properly adjust, although quick change tool heads do help. Lord help you if there is a problem at one station, especially if components are being fed by the press. Now you have to shut off the feeds, then clear all the stations to find and correct the problem. It can be a time consuming PITA. I run my tired old LEE as follows—
I don’t size or de-prime because 1) I want to clean the primer pockets and 2) the primer residue would build up under the shell palate and have to be cleaned out.
I set it up to prime only, feeding both cases and primers. Simple operation, works great.
I then set it up with powder charge (auto) at the first station, bullet seat (manual) at the second, and crimp at the third. Also works great, much less to go wrong. Once you are at this point, getting a loaded round for each pull of the handle, it is MOST satisfying. I actually find it easier to stay focused because there is a lot going on—case feed, powder feed, bullet placement, loaded round ejection. Like I said, anything less than 100 rounds, and it’s back to the single stage press.
Some good points in here. One I will get to is record keeping. If you don’t keep records, you will end up unhappy.
The more complex a machine is, the longer it takes to set it up and get everything adjusted correctly. The more parts that have to work perfectly, every time, the more likely that something will get out of adjustment.
I have never used a progressive press. Having looked at the RCBS turret press, I’m thinking that would be an upgrade for my Lee turret press. Regardless, there is a learning curve to each machine and reloading presses are machines.
This reloading series and the input comments have made for an excellent cold morning read. Thank you all
I am not sure why you didn’t include the cost of the projectile in your per reloaded round calculations. Would add quite a bit to the price?
Because I was typing the HTML manually and messed up? Good catch. It is updated.
And remember kids! No matter how much you know, reloading will teach you stuff you thought you knew but didn’t know. Write everything you do down. And yes, RHT447 is rht, a progressive press is a beeyatch to set up. Im still fiddling with case feed adjustments… but I luv it. It IS fun to run. I don’t have any “auto feed” on cases or bullets, just the primers and that has a low count alarm.
Many of the images come up 404 not found.
Sorry about that. I replaced the original images after increasing the exposure to make them less dark. The tool didn’t update the post as I expected it to.
SS pins are the bee’s knees for like new brass. Even nasty range brass sparkles inside and out after 90 minutes of tumbling. There are many good rotary tumblers/kits out there, mine happens to be a Lyman Kit which comes with a decent pin separator. From a suggestion on YooToob, I use this stuff to clean—
https://www.walmart.com/ip/Armor-All-Ultra-Shine-Wash-and-Wax-64-FL-OZ-Bottle/16817381?athbdg=L1600&from=/search
Seems to help keep the brass from tarnishing. A couple of capfuls will do. If you still have soapy bubbles at the end, you used enough. Plus a ½ teaspoon of so of Lemishine. Too much won’t hurt anything, but may turn your brass “pinkish”. I load up the tumbler and run it for 90 minutes straight, less if the brass doesn’t need it.
Rounding up errant SS pins. Use an empty margarine tub or something like it. Put a Harbor Freight (cheap) magnet in the tub and hover around to pick up pins. Hold tub over where you want the pins to drop, remove magnet.
Trimming. My trimmer is Forester hand crank. Fortunately they sell an adapter so you can power it with an electric drill. I have used it for decades. The cutter is still sharp, and the bearing and shaft are still tight and true.
Primer pocket swage. A PITA, but fortunately only needs to be done once. I find it useful insurance to make a light pass with the pointy end of a burring tool, just to add a little extra chamfer to the pocket rim.
Might be interesting to have a discussion about different case lubes. Mine is old school RCBS lube with a foam pad, mostly because long ago I fell into a life time supply of the lube. I use lighter fluid (no, I only smoke if I’m on fire) to thin it out a bit. If I have sized and trimmed the cases, I will run them back through the SS pins to remove the lube and any chips from trimming. If I have only sized them, I toss them into a plastic bucket and spray them with “Gunk” engine degreaser. Let sit for 20 minutes, rinse, repeat with Dawn dish soap. Here in Texas, I set them in the sun to dry.
I might try the plastic bucket method. I’ve been using Purple Power to degrease my cases lubed with Redding Imperial sizing wax. My method has been to spray some on a paper towel and then wipe the case.
.
It is the one step I really dislike doing.
A wealth of information. Scroll down for his shooting pages.
https://www.frfrogspad.com/
So you’re making JHP for about $.10 cheaper than I can currently buy ball ammo locally. Assuming that start up cost to go from zero to making rounds is about $500 for a cheap set up, that’s 5000 rounds before I break even.
I think the 9mm is probably the worst case scenario. The cost to reload .45 or .44 mag, .357 mag is just about the same as for nines- a little more powder. But if you buy new, there is a pretty decent savings by reloading.
I cast my own bullets for .357, .38 special, .45 ACP, 30-30 Winchester, 45-70, and a couple of others. That reduces the price even more.
.
A large part of the reason I’m doing so much reloading is because of availability. As well as spreading out costs. I use IMR4895 for my 30-06, 8mmx57, .303 British, 5.56×45, and likely a couple of others. I buy 4895 when it is available with no hazmat fee.
.
The same way I’ll buy primers when there is no hazmat fee and there is good pricing. Of course, availability as well.
.
Right now I’m loading 5.56×45. I’ve loaded around 500 rounds in the last week. I expect to load another 1000. My “cost” for those 1500 rounds was $76 for the brass and whatever I paid for the bullets from RRM. I already had 750 bullets, I already had the primers, I already had the primer.
.
For my low budget, that means that I didn’t have to come up with $750-$1000 for those rounds, it was around $150.